It is a small GPS tracker for the Smart System on your Bosch eBike. Discover what it can do and how to install it yourself.![]()
How the Bosch Connect Module works
You must connect it to the motor – the Connect Module itself contains a GPS tracker and a mobile phone Module, which allows you to locate your eBike at any time via the EBike Flow app. This means that you always know where your eBike is and, in addition, in the event of an attempted theft, an integrated alarm system will alert you. As soon as the integrated motion sensor detects that your locked eBike moves, the Connect Module triggers an alarm – at first, there is always a light warning tone to say: “OK, this is secured”. Maybe it’s just a bump on your bike, so nothing happens at first. But if the external impact continues, a really loud alarm sounds. You can hear that in the video hereafter as well. In addition, the GPS tracking will start and you will receive a notification on your smartphone:
Attempted theft!
You can immediately see where your eBike is and call the police saying that your eBike is probably being stolen.
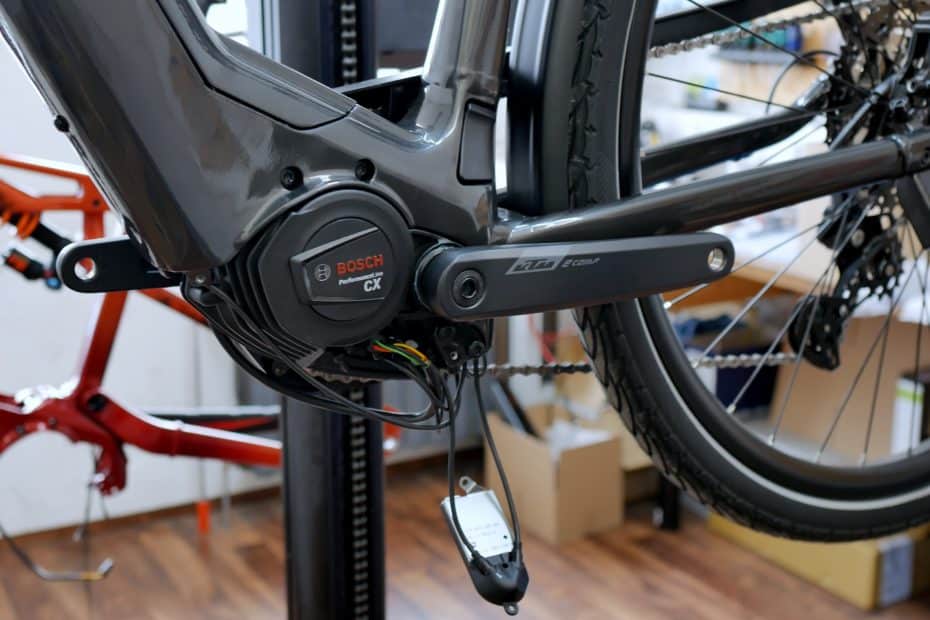
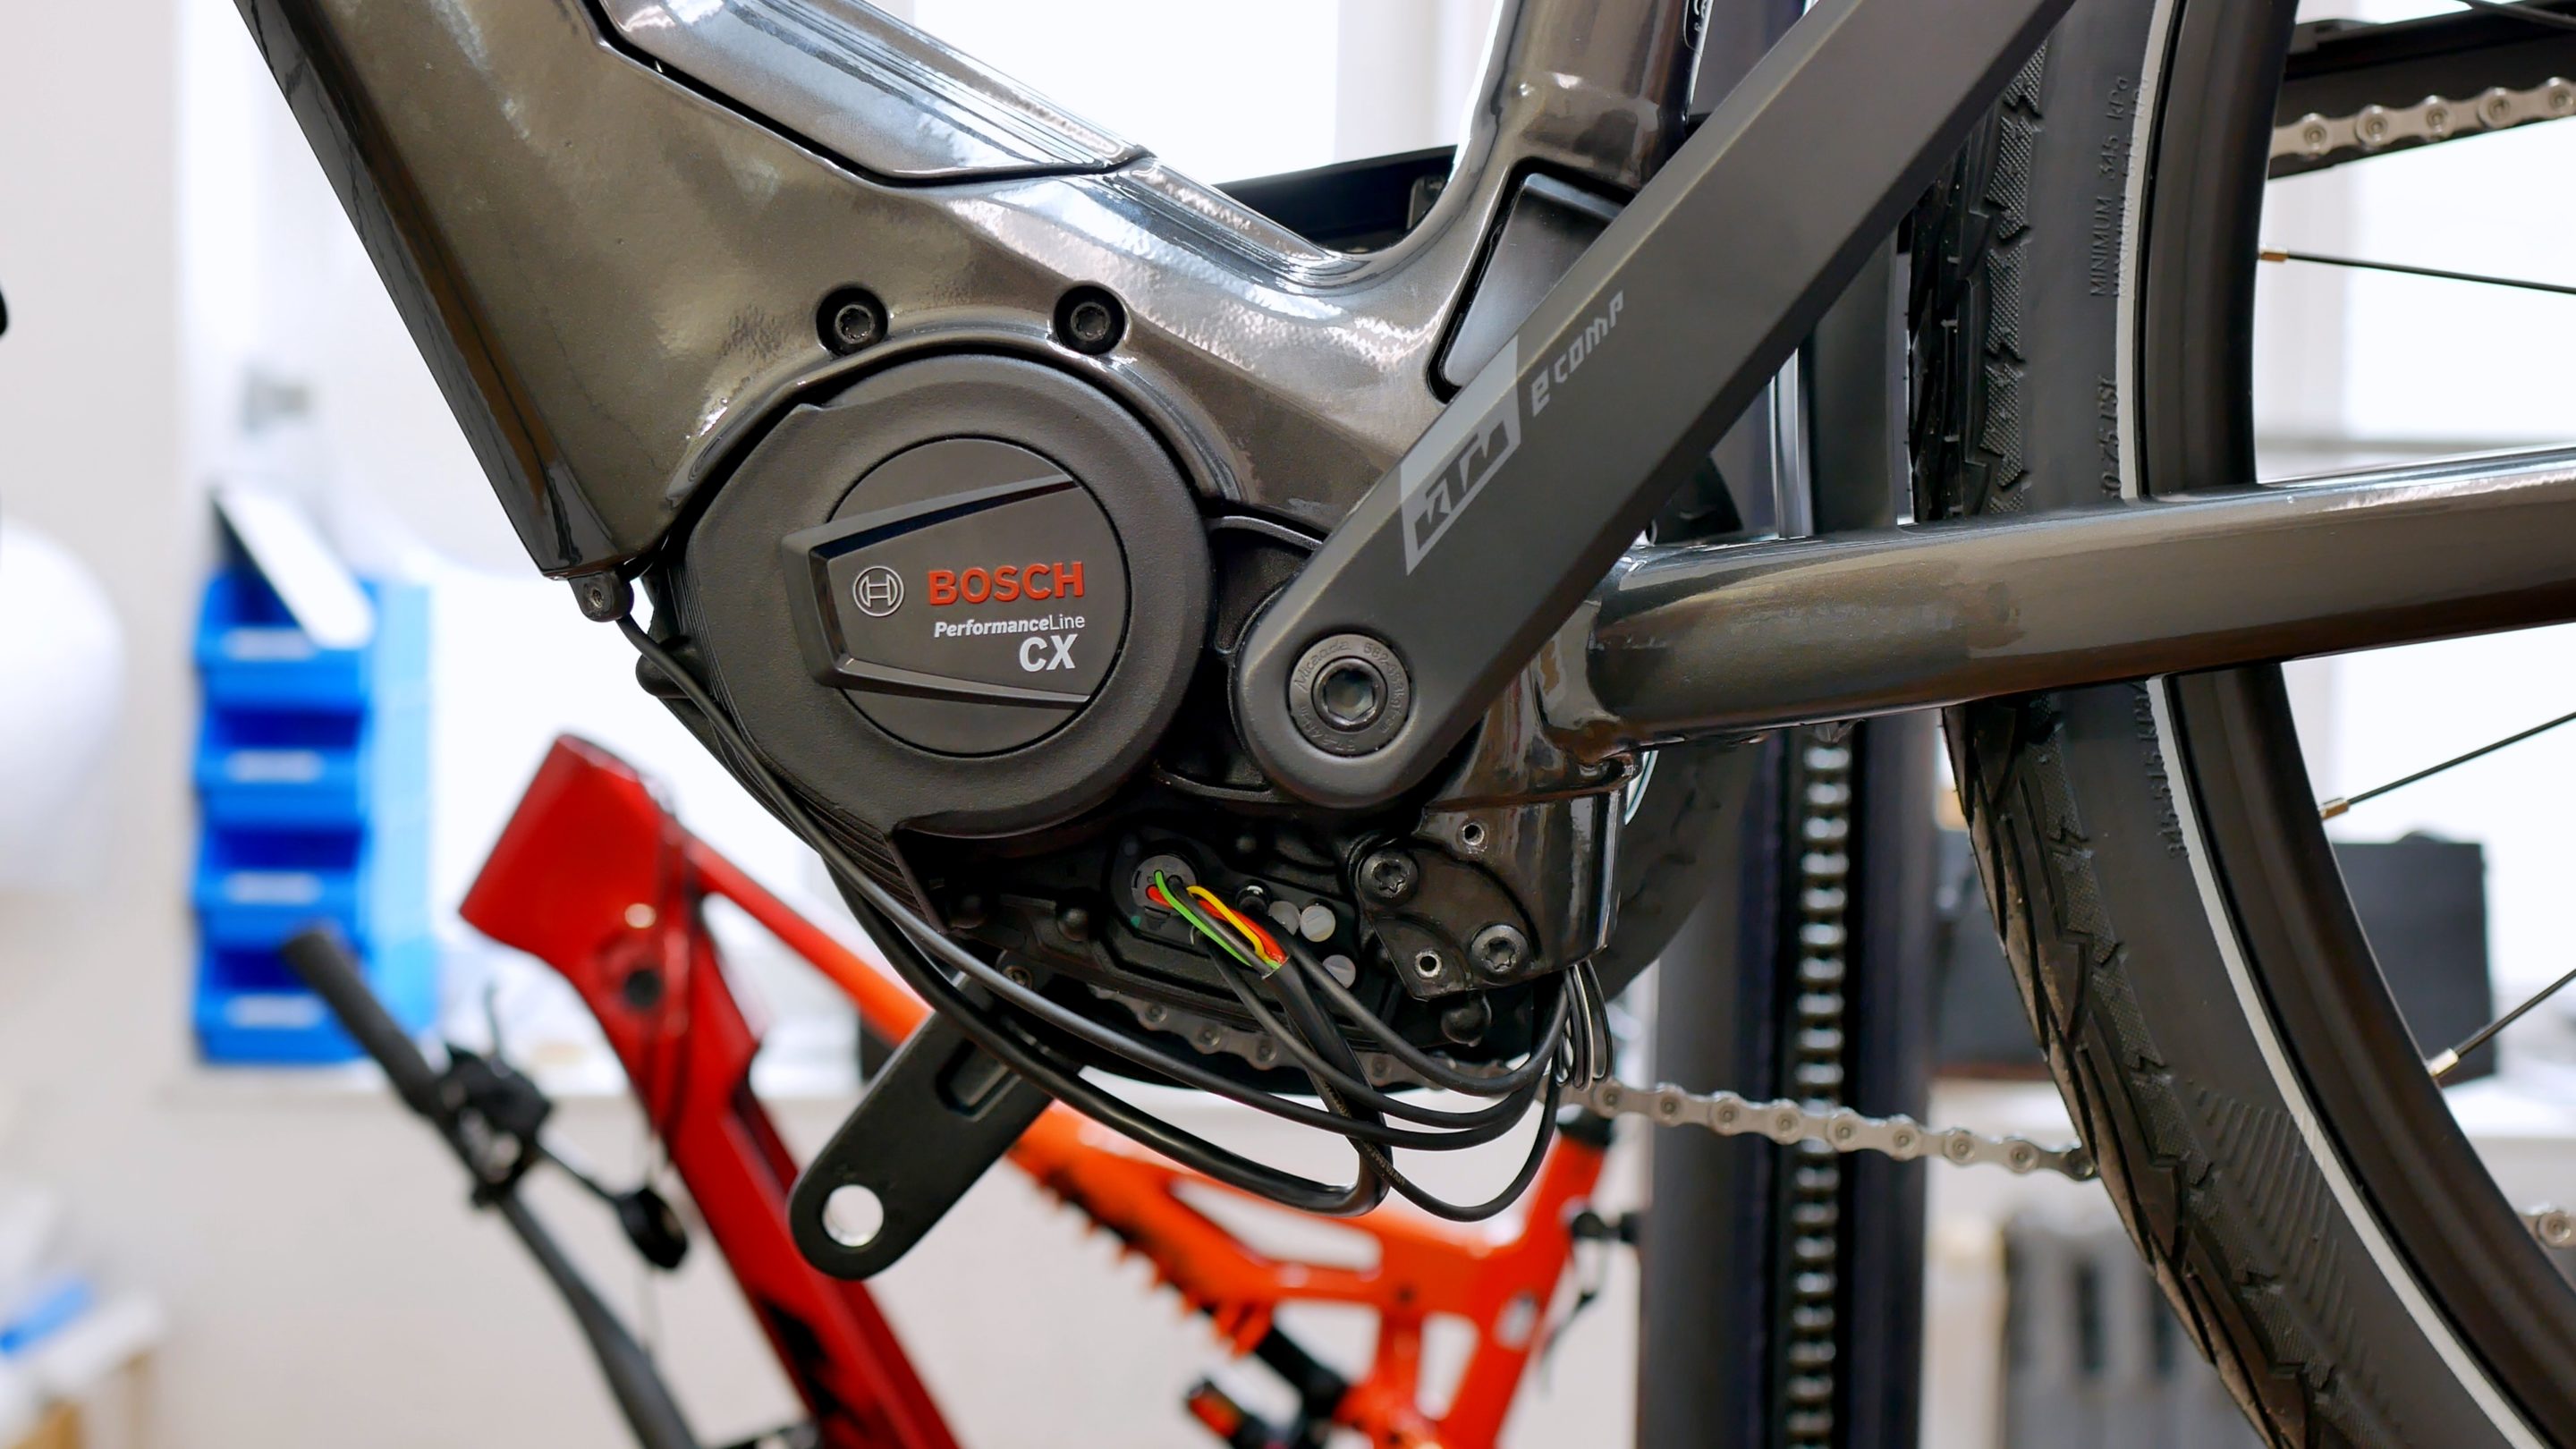
The Bosch Connect Module is compatible with all Bosch Smart System eBikes launched from 2022, meaning all eBikes with Bosch Performance Line CX Smart System and the CargoLine Smart System motor as well as the Performance Line motor.
Be careful to distinguish – there are still two different versions
The difference here is the mounting plate between the Gen 4 motors – the Performance Line CX and the Cargo Line, and the Performance Line motor, which still works on the Gen 3 in terms of design.
You can easily tell by looking at the name of your motor and the logo sticker that is attached to it, or by looking at the crank and chainring mount. On the Performance Line it is the Mini Isis standard and on the Gen 4 Performance Line CX it is a normal Isis standard.
Let’s look at retrofitting the Connect Module to the Bosch Performance Line CX Gen4 motor, which in our opinion is the most widely used motor of the Smart System.

Bosch Connect Module mounting
You need:
- a 20 mm Torx screwdriver
- the Connect Module itself with the matching plate – this should be considered when ordering, that you also order it for the Performance Line CX.
- a small mount, or it’s rather just a rubber stop, which is then attached to the motor
- the corresponding fastening screw for the Connect Module
- a short display cable, with which you can then connect the Connect Module
- the EBike Flow app on your mobile phone – already paired with your eBike
That’s actually all it takes for retrofitting.
A quick word about the difference – if you have a Performance Line Smart System motor, the mount looks slightly different, it has to be glued to the mounting plate, otherwise the steps for connecting are completely the same, it’s only the mount that’s different because the motor’s housing is constructed slightly differently.
Before you start, of course, you have to turn on the eBike. In case of a completely new bike, you have to connect the EBike Flow App to the eBike first and switch it on.
Then you open the EBike Flow app on our mobile phone and it will tell you what to do next. When you open the EBike Flow app for the first time, you will see that you can now connect an eBike.
Simply press “Connect now” and select the type of control unit you have. In our case, this is the classic LED remote. Just press the on/off button until the LED remote starts flashing and you can see the pairing on the Kiox 300 display. Now you just wait until this works.


Allow Bluetooth pairing and everything works, and you are actually ready to go, you have connected the eBike Flow app with your new eBike and can now proceed with the further installation of the Connect Module.
Of course, it is also possible to install the Connect Module first, but many of you already have the eBike and want to retrofit it. Therefore, you first connect the app, can make all the settings here and look at how the installation and retrofitting of the Connect Module works in detail. First remove the motor cover with the Torx20 screwdriver and then you can simply install the Connect Module.
To do this, you loosen the four fastening screws. Of course, the motor cover can always differ slightly from manufacturer to manufacturer, so you always have to see for yourself how the motor cover is fastened and how you can remove it.
For instance, with a KTM it is relatively simple with the four screws. Then you have two more screws on the other side.
For this kind of work, it’s always good to raise the bike a bit. If you don’t have proper assembly stand, you can put it on a bench or on a slope, where you can get to the parts a bit easier and with less strain on your back. It’s a bit uncomfortable on the floor, but it works in the end.
Once the motor cover removed, you have a mess of cables in front of you, and can start connecting them. The Connect Module is simply connected between the display and the motor, which means you only need the short display cable, which you then connect in between. The display connection is marked in red, so you have to check which socket fits. In this case, or always with the Performance Line CX Gen4 Smart System motor, it is the first, right-hand, upper socket, next to the large battery cable.
We can then simply pull it out of the motor, if possible, of course, grab the plug at the front so that you don’t pull the cable. If it’s the same colour – you’ve got the right cable. Then you can plug the new short cable back into the socket, that has become free. Make sure that you also plug this white marking into the white marking on the socket at the upper end, this way the polarity will always match.
The next thing you need is the Connect Module itself. The Connect Module has two connections – marked 1 & 2 – and you plug the short display cable that you just connected, into the first slot. There is a small white marking at the top as well, so it’s easy to say that white always goes with white, which ensures that the connection always works perfectly. Plug it in firmly – you will notice a little resistance and then it will sit securely without any problems. Then you can plug in the second cable, which comes from the display, so to speak. The same procedure – white to white until the small resistance is overcome, and now the Connect Module is actually already connected to the eBike. Now you just have to make sure that it is neatly integrated.
Now you take the rubberised stop, or the Connect Module holder, and simply insert it here at the bottom into this recess, a rounding perfectly fitting into the rounding of the housing. You can just insert it and then it will hold, so you don’t have to screw anything in. The rubber also makes it a bit flexible. There is a tiny slot in this recess that fits the Connect Module perfectly, so you can first insert the holder and then the Connect Module itself.
-

- Bosch Connect Module installation tutorial – connecting cables

-
- Bosch Connect Module installation tutorial – connecting cables

-
- Bosch Connect Module installation tutorial – connecting cables

Now you have to be a bit careful that you get the cables laid reasonably well without causing a big kink. That’s a bit of a challenge. Now you can mount the Connect Module directly on the frame, in the appropriate hole. Other manufacturers use a mounting plate – in that case it would have to be fixed to the mounting plate. If you put it in the holder like this, you will automatically see where the holder goes and where it can be mounted.
Now you have laid all the cables quite neatly. Sometimes it can happen that you have to unplug the other cables, for example the light cable or the battery cable, in order to lay them differently. You can now mount the whole thing with the supplied screw and the Torx screwdriver.
Again, make sure that all the cables are laid reasonably well before screwing the whole thing in place. Now make sure that you don’t squeeze any cables – otherwise you’ll have another problem. Make sure that the cable is correctly positioned in the recess and then hand-tighten it so nothing can wobble. Now the Connect Module is mounted on the frame, the cables are laid, everything is connected and in the next step you only have to mount the motor cover again.
When mounting the motor cover, make sure that all cables are inside the motor cover and are not squeezed, as this varies from manufacturer to manufacturer. Now, of course, you also have to place the Connect Module safely there. In our case, however, there is enough space and you can do this without any problems.
Check everything again to see if everything is secure and tighten it if necessary. Now the physical installation directly on the motor is done. I think somewhat experienced mechanics can do this in 10 to 15 minutes, but it is also a manageable task for eBikers who rarely work with tools.
-
- Bosch Connect Module installation tutorial – inserting Bosch Connect Module

-
- Bosch Connect Module installation tutorial – inserting Bosch Connect Module

-
- Bosch Connect Module installation tutorial – connecting the application

Now start the eBike Flow app and have another look at all the options there. Under Settings you now have “Activate eBike alarm” available. Click on it – “Activate eBike lock and alarm”.
Now something is already happening on the display and you have heard a short sound, so the Connect Module is already making noises. “EBike is locked” now appears on the display. Then you can press “Finish setup” here and the whole thing will be set up and ready to go.
When you switch off the eBike, it locks automatically and when you are near it with our mobile phone and switch it on, it is unlocked and you can start riding as usual.
Video of the installation
Find more ebike tips here.


