

Among the displays for the Smart System, the Kiox 300 and Kiox 500 are the two flagship models from Bosch. They are supplied with preset displays. As of this year, you can customise these displays, called Ride Screens, within a certain framework. All it takes is a few clicks in the eBike Flow app.
Displays for ebikes are simple computers. And in the private sector, we are happy to customise them to our own preferences. Or do you use your PC, laptop or tablet with the factory settings? Probably not. The display is no exception. Bosch is certainly aware of this. And so the manufacturer offers the option for the two devices mentioned that you can specify which and how much information is displayed on the Kiox 300 or Kiox 500 and in what order.
Customising the Ride Screens – step by step
If you want to change the ride screens for your display, you can do this in just a few steps. You can edit the sequence of Ride Screens and their content, add new Ride Screens and delete superfluous ones. To start, switch on the ebike and connect to the Bosch eBike Flow app. Make sure that you are using at least version 1.16.8 of the app. If this is not yet the case, carry out an update first.
Once you are ready, select the familiar settings icon at the bottom right of the app home screen. Once there, open the “My eBike” menu. A list with further submenus then appears. Below this, you will now find the “Display configuration” item. Tap on it and you’re ready to go.
-

- “Settings” menu item

-
- “My eBike” menu item

-
- “Display configuration” menu item

On the next screen, you will see the current start screen of your display prominently displayed. Below this, the options you have to configure the display are listed. We will now go through these individually.
1. Change the order
By tapping on the “Change order” menu, a list of all current ride screens appears. If you press on one of the screens for about a second, you can simply move it up and down with your finger. In this way, you can now determine where which screen should be displayed in future. Once you have decided, simply press the button labelled “Save on display” at the bottom of the display with a blue background. If this was successful, a green tick will immediately appear with a brief confirmation that your change has been successfully saved.
-
- Press long enough on one of the Ride Screens

-
- Ride Screen can now be moved

-
- Press the button at the bottom to save

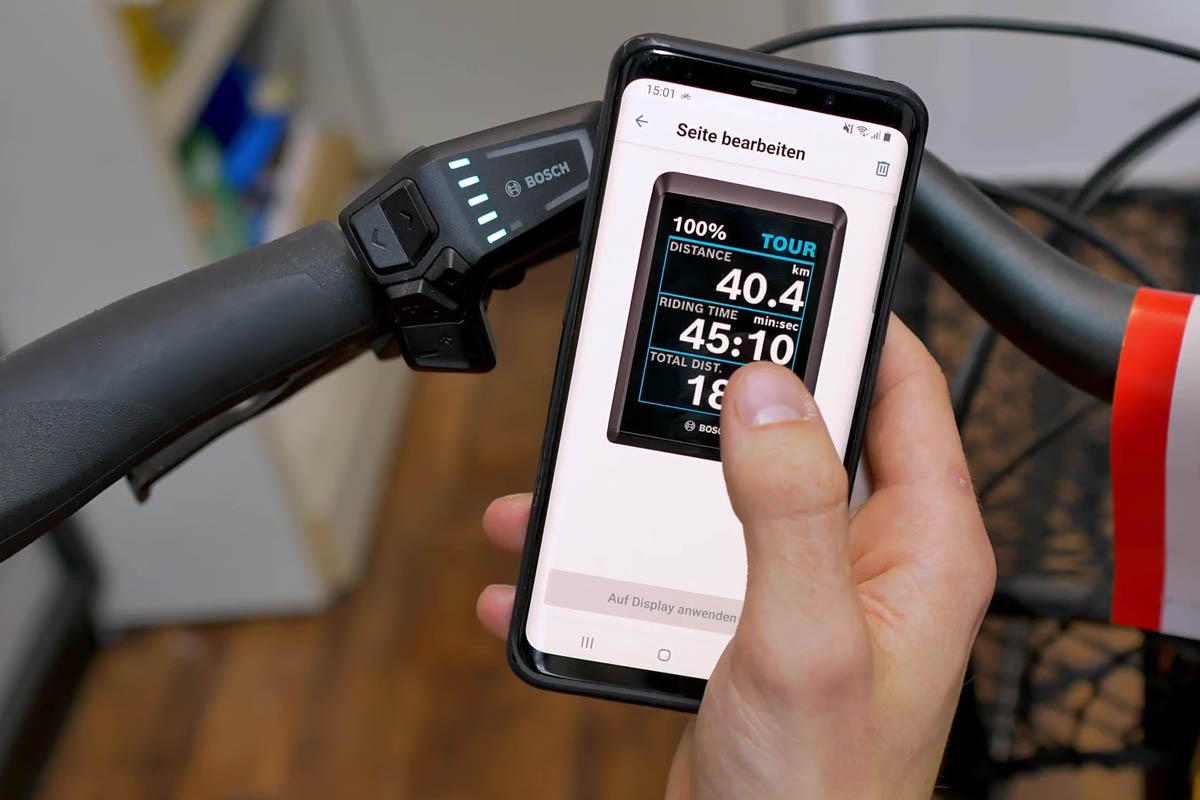
2. Edit screen
In addition to the order of the ride screens, their content is also factory preset. If you want to edit this, start from the main view of the display configuration. There you can scroll through the ride screens at the top by swiping sideways and select the one that is shown in the miniaturised display. You can only edit this single ride screen at the moment. The numbering of the Ride Screens is shown below this view. You can see how many are currently created and which one you have currently selected.

Select the desired Ride Screen
Once you have reached the screen you want to edit, click on the “Edit screen” menu item. This will take you to a larger view of this screen. This is divided into a maximum of three data fields, each separated by a thin blue line. To make changes, click on one of the fields. A list then appears with the available details that you can now display in this field. The list is a little longer. Scroll through it at your leisure. Once you have reached the desired information, press it once and it will change to the data field. Save your selection with the “Save on display” button highlighted in blue.
-
- Select the data field by tapping on it
-
- Determine content
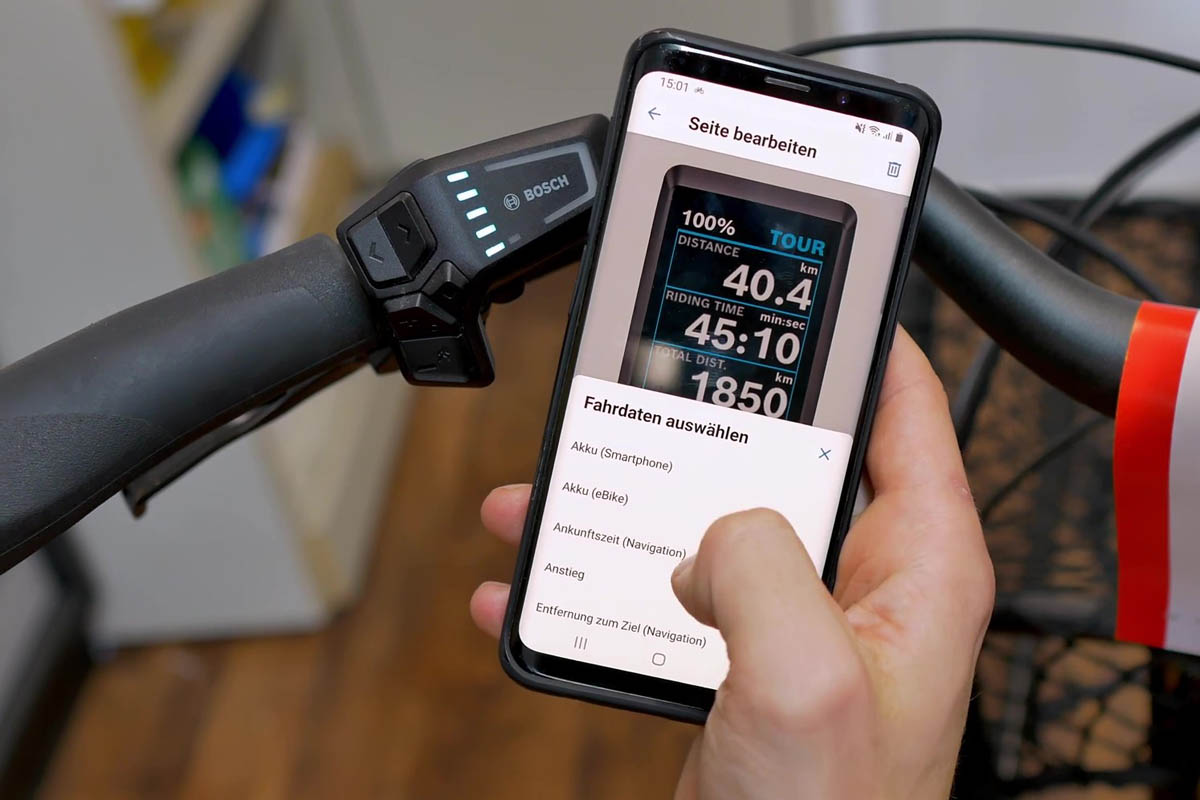
The process works live. This means that the moment you save the change in the app, it is already visible on the ebike display. So, if you want, you can use the control unit to go to the screen you have just edited and see the change on the Kiox 300 or Kiox 500. Important to know: The same information can be selected multiple times and thus displayed on multiple screens. This is even possible in one and the same Ride Screen – even if this should hardly be necessary 😉.

Ride screen with newly defined data field
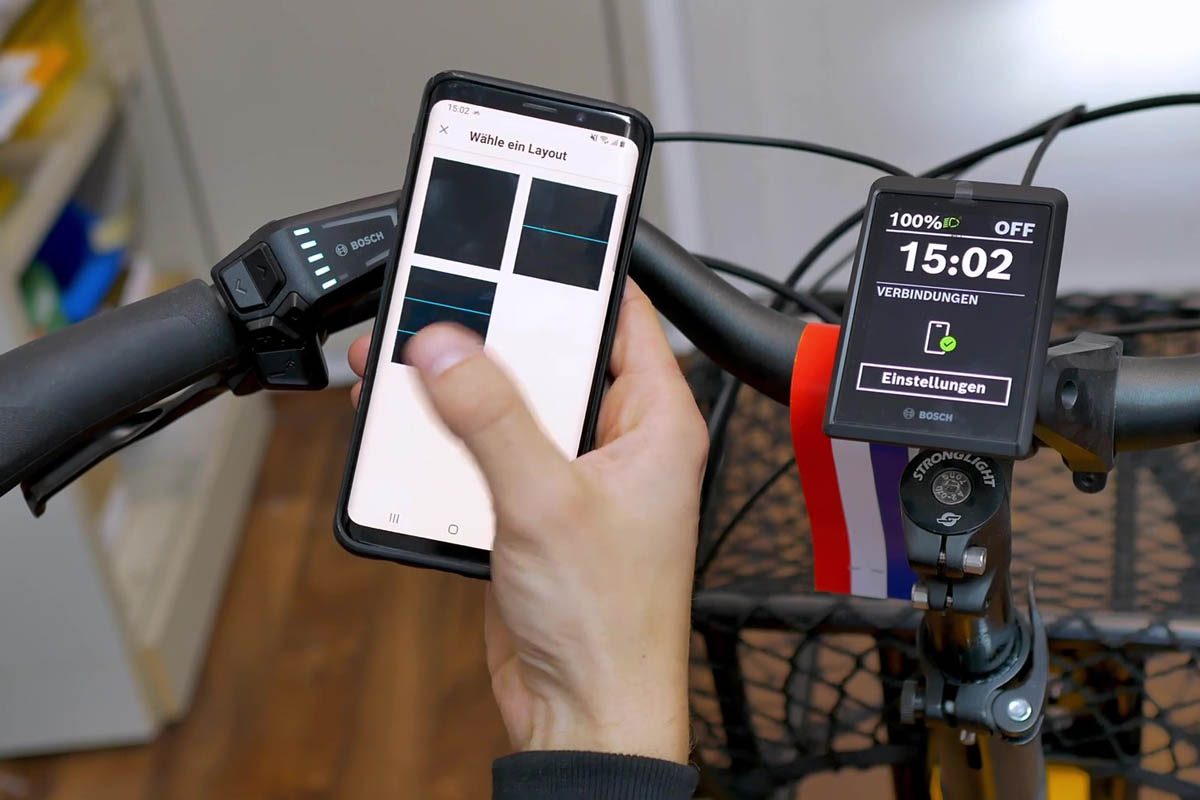
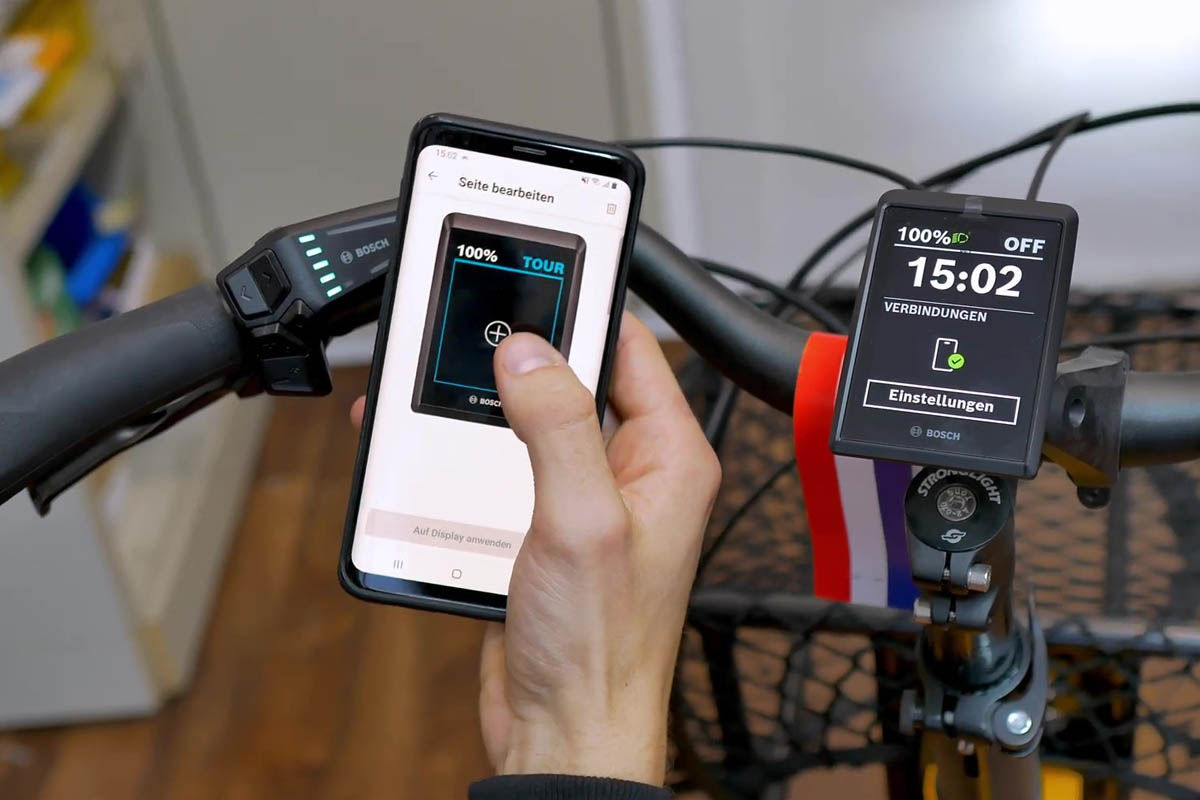
3. Add screen
To create a new Ride Screen, start again from the start page of the “Display configuration” menu. There you will find the “Add screen” option at the bottom. If the text is greyed out, you have already reached the maximum of 13 screens for your display. If this is the case, scroll to any Ride Screen in the miniaturised view of the display, tap on “Edit screen” and delete it by tapping on the trash can icon displayed at the top right.
Next, you can click on the “Add screen” menu from the display configuration as planned. In the layout that appears, you can select designs with one, two and three data fields. We have already explained how to enter which information in the fields in the “Edit screen” paragraph. Simply proceed in the same way. Again, when you save your selection, it is immediately applied live on the display.
-
- Ride Screen featuring one, two or three data fields
-
- Example of a Ride Screen with a single data field
-
- Select the desired information from the list

-
- Maximum speed selected as an example

-
- View of the newly added Ride Screen in the app

Pictures: Elektrofahrrad24


